
This post contains affiliate links.
For serious magicians, the one-handed cut is an important card sleight. With the transfer, you can halve the deck with one hand only. It looks cool, and for some of the more sophisticated card tricks, this is required. This post will walk through how to cut a deck with one hand.
The one-handed cut, also known as the Charlier cut or Charlier split requires you to hold your hand with a deck, break it into two parts, or switch card locations. The motion is a colorful one that increases the magic of your trick.
The fastest one-handed slice is the Charlier split, where you require the bulk of the work to be completed if you place one set of cards over the other.
Below, you'll find step-by-step instructions on how to cut a deck with one hand. Here are some video tutorials as well, if you prepare that option.
Steps to Cut a Deck with One Hand
These steps take some practice, but not as much as many handshakes. But it's going to be worth it. You may include this in your current tricks or potential tricks. Even if this move isn't necessary, once you incorporate it, it adds extra flair.
Divide the deck into two pieces and tie them together using rubber bands as you know how to slice the one-handed. You can learn the movement without constantly collecting drop-down cards.
Cut rubber bands and continue to practice if you are comfortable with the break.
Bear in mind that when you practice you don't have to use the whole board. Using half a board— or anything easy— and know how to navigate and get used to clearances and other stuff.
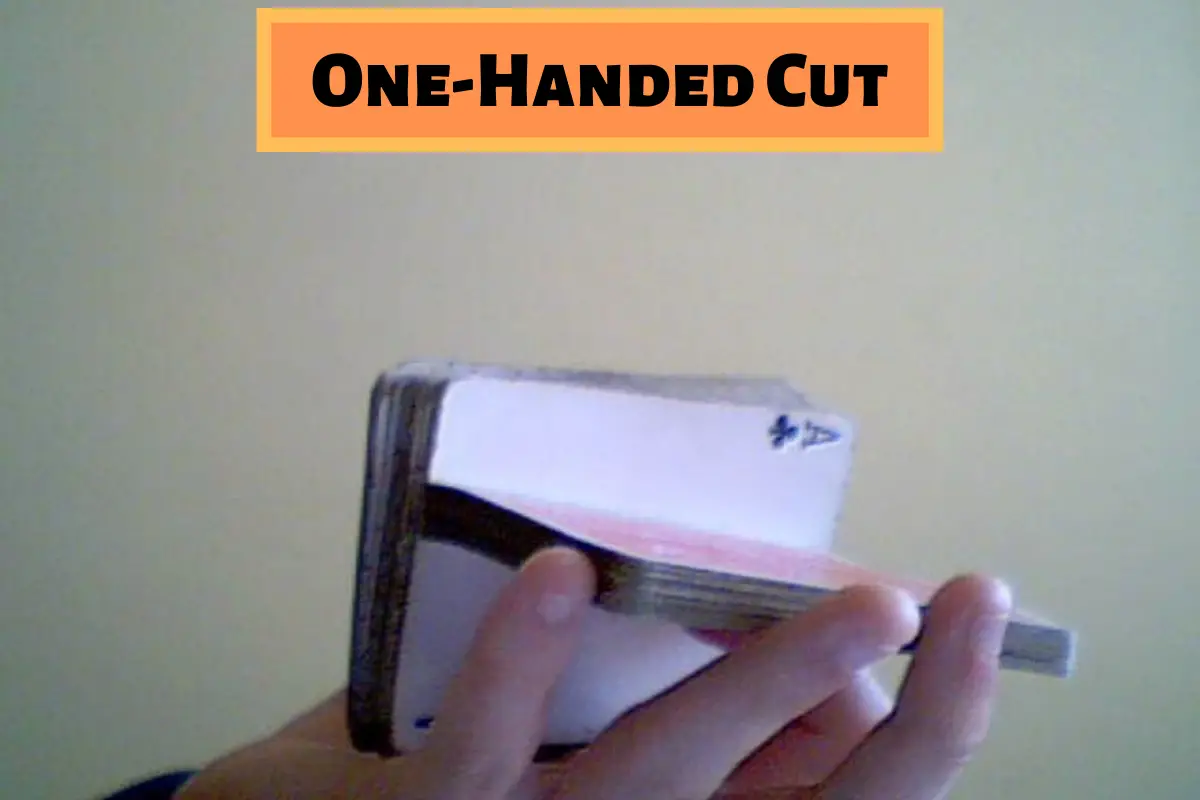
Step 1: Prepare Your Hold
Hold your palm on your deck on your left. Enable your palm to rest and your below fingers to rest. The cover of your hand should be palm down and face up through the whole coupe.
Catch the deck with the handle of the dealer, which ensures that the thumb width is one long arm.
On the other long side, put 3 fingers and finger index on the top. The decks are to be flat against the palm at this stage.
In short, you want to rely on the index finger and rosé finger most of this stress on cards. There is help with the middle and the ring fingers.
Step 2: Cut Down With Your Thumb
Then you will cut down the cards with your thumb as close as possible to the middle of the deck. You would like the thumb to divide the top half of the deck into two.
Something like that should look. When you shoot off, you want your index finger to release pressure. To break it into two, most of the tension should be in the palm.
Take your rosé up to the end of your cards first, then you can use it to raise the deck.
Stir up the deck so it is no longer on your hand. Divide it between the fingers; the finger pads should be the chips, not the ends. Hold the thumb on one long side, 2 opposing sides, and 1 on each end.
Step 3: Cut the Deck
Place any cards in your side with your index finger. You should have the index finger at the top of the deck.
Glide your hand down the edge of the cards until you hit a place where you want them to be sliced and use the fingertips to bring the cards down into your palm.
If that step makes it difficult, then try to relieve some of the tension off your roses and index finger.
Step 4: Finish the Cut
Now, for the break, you are set. If your thumb moves off the top half, remove the index finger from the deck completely. Pinky must maintain the balance of the board. Make sure you gently tip the deck towards pinky. Only slip down the lower cards over the top ones.
Once you reach the other side of the top cards, the long edge of the bottom cards clears the room to gradually drop the top cards onto the fingertips below.
Use your thumb to guide the bottom cards on top of the cards that fall below. When necessary, keep the top cards with the thumb tip as far as the bottom cards are visible.
If your hands are too big, simply lift the fingerprint off the cards in the lower cards to even it out. If you see a hand too large still, try buying cards that are slightly smaller than poker cards. If your hand is too small, try to buy them.